
What the Plastic Limit Test Actually Measures
The plastic limit test determines the lowest moisture content at which a cohesive soil can be deformed without crumbling. When a soil sits at exactly this moisture level and you roll it into a thread, it will crack and break apart right as the thread reaches 1/8 inch in diameter. Roll it thicker and the soil stays plastic; roll it thinner and it crumbles prematurely. That transition point—expressed as a percentage of dry mass—is the plastic limit (PL). The full procedure, including the liquid limit and plasticity index, is standardized under ASTM D4318.
The test applies to fine-grained soils: clays and silts that pass the No. 40 sieve. Gravelly or sandy materials typically return a non-plastic (NP) result because they lack the clay mineralogy that causes plasticity. When a soil is NP, the plasticity index cannot be calculated and classification shifts to grain-size data alone.
Step-by-Step Procedure Under ASTM D4318
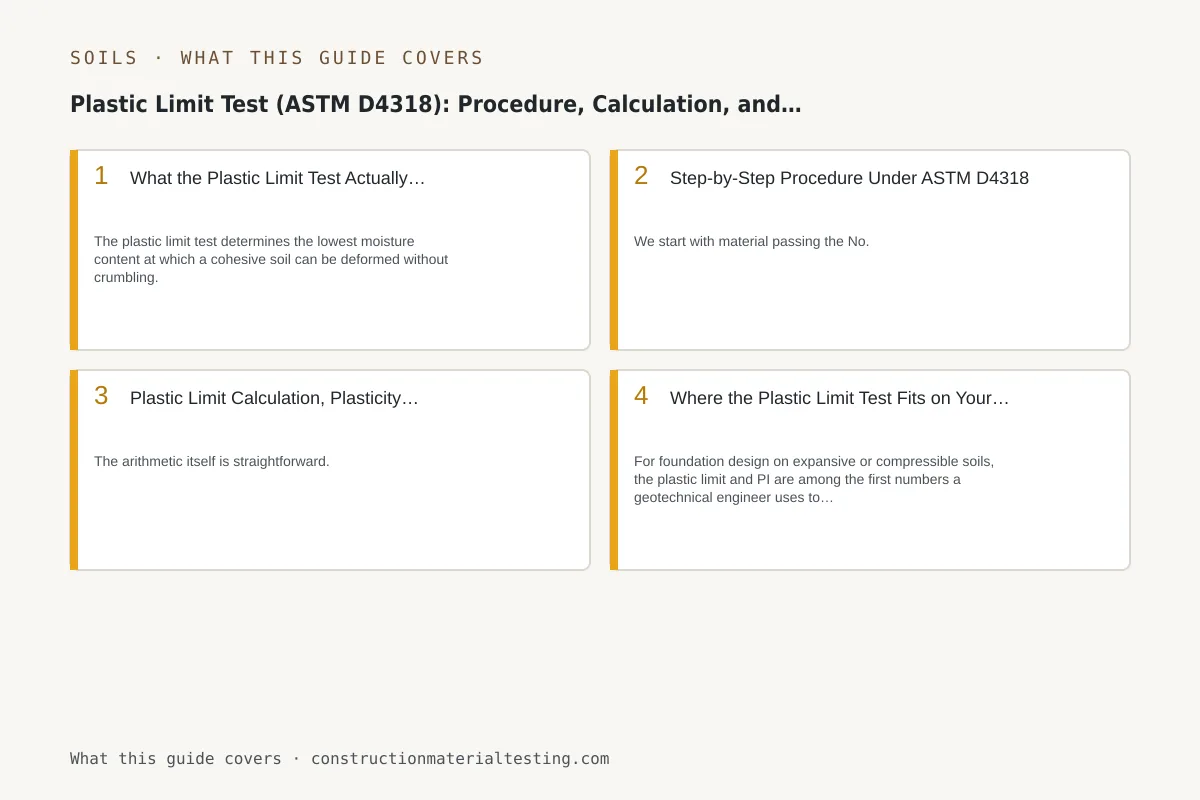
We start with material passing the No. 40 (425 µm) sieve—either wet-processed from a fresh sample or air-dried and re-wetted with distilled water on a glass or porcelain mixing plate. The working portion is roughly 20 g. We mix in water until the soil forms a uniform, plastic mass that does not stick to the hands. From that mass we roll a ball about the size of a marble, then place it on a clean, dry glass plate and begin rolling with the palm of our hand, applying light, even pressure.
The target is a thread 1/8 inch (3.2 mm) in diameter—a standard that sounds simple but takes practiced judgment. We keep a steel rod or a drill bit of that diameter nearby as a reference. Rolling pressure should be enough to thin the thread but not so aggressive that we work moisture out of the soil artificially. If the thread reaches 1/8 inch and the soil is still intact and pliable, the sample is too wet. We gather it back into a ball, allow it to air-dry briefly, and roll again. If the thread crumbles before reaching 1/8 inch, we may have let it dry too long. The correct end point is crumbling or just beginning to crack exactly at 1/8 inch diameter.
Once the soil crumbles at the target diameter, we collect the crumbled pieces immediately into a pre-weighed moisture can, seal it, and proceed to the second trial from a fresh portion of the same working mass. We run at least two trials per specimen. The moisture content of each trial follows ASTM D2216—wet mass minus oven-dry mass divided by oven-dry mass, expressed as a percentage. ASTM D4318 requires the two trials to agree within two percentage points; if they do not, we run additional trials. The reported plastic limit is the average of the qualifying trials, rounded to the nearest whole number.
Plastic Limit Calculation, Plasticity Index, and What the Numbers Mean
The arithmetic itself is straightforward. Plastic Limit = average moisture content at thread crumbling. Plasticity Index (PI) = Liquid Limit (LL) minus Plastic Limit (PL). Both are dimensionless percentages. What makes interpretation non-trivial is understanding where a particular soil's values place it on the Casagrande plasticity chart and what that means for the work at hand. Our Atterberg limits resource page walks through that chart in detail, but the general pattern is as follows: a low PL (under roughly 15%) combined with a low LL often indicates a silty soil with limited cohesion; a PL in the 15–30% range is common for lean clays (CL); a PL above 30% typically signals a fat clay (CH) with meaningful swelling and shrinkage potential.
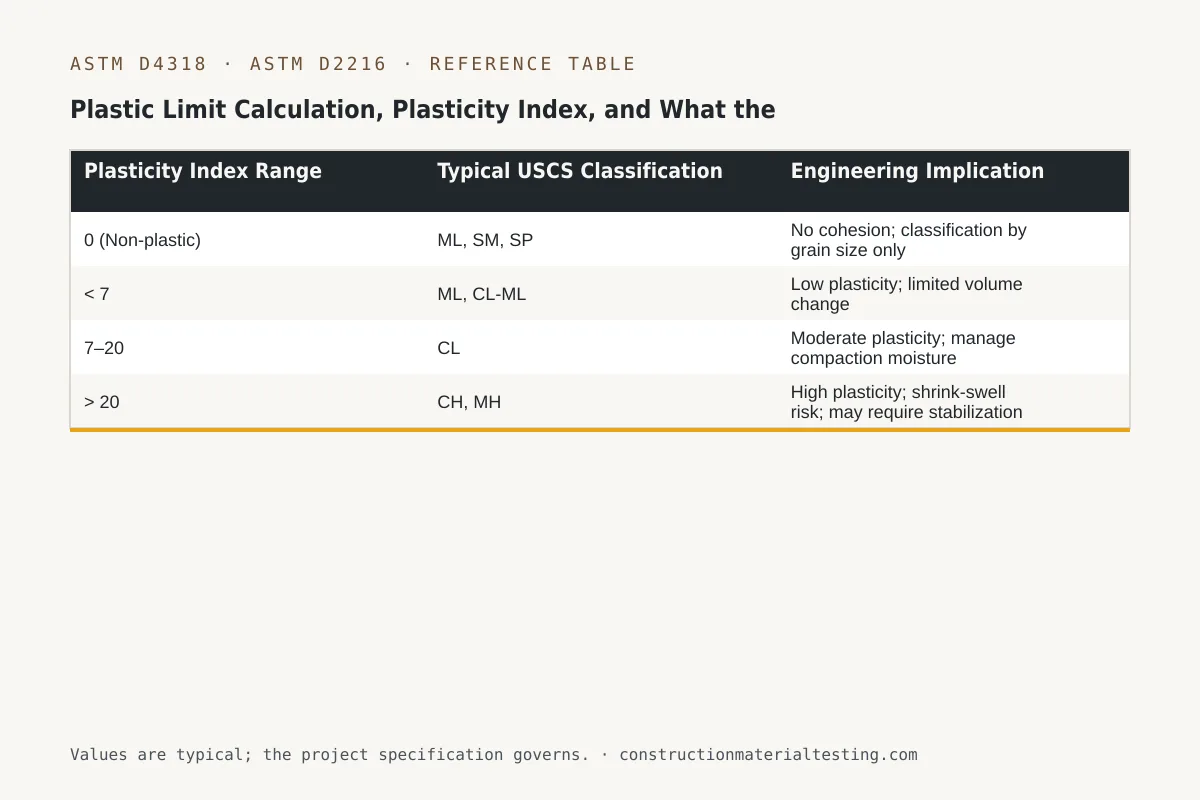
PI is the more commonly cited derived value. A PI below 7 is generally considered low plasticity; above 20 puts a soil in moderate-to-high plasticity territory where volume change under moisture fluctuation becomes a design concern. For pavement subgrades, many state DOT specifications cap acceptable PI at 10 or 15 to limit swelling distress. For earthen embankments and compacted fill, the PI informs whether a soil can be worked across a range of field moisture conditions or whether tight moisture control is mandatory.
The plastic limit also sets a practical lower bound for compaction moisture targeting. Compacting a cohesive soil well below its PL is difficult—the material behaves almost like a granular and resists achieving density. Compacting near or above the PL without staying below the liquid limit risks pumping and shear rutting under roller passes. Proctor testing (ASTM D698 or D1557) locates optimum moisture relative to the Atterberg limits, but knowing the PL helps the field technician and the geotechnical engineer understand why a soil is behaving the way it is when conditions change.
| Plasticity Index Range | Typical USCS Classification | Engineering Implication |
|---|---|---|
| 0 (Non-plastic) | ML, SM, SP | No cohesion; classification by grain size only |
| < 7 | ML, CL-ML | Low plasticity; limited volume change |
| 7–20 | CL | Moderate plasticity; manage compaction moisture |
| > 20 | CH, MH | High plasticity; shrink-swell risk; may require stabilization |
Where the Plastic Limit Test Fits on Your Project
For foundation design on expansive or compressible soils, the plastic limit and PI are among the first numbers a geotechnical engineer uses to assess risk and set bearing recommendations. For subgrade evaluation under IBC Chapter 17 special inspection requirements and project-specific geotechnical reports, Atterberg limits are routinely required during earthwork. Our ASTM D4318 test method page outlines exactly what we report and what sample quantities are required. If you are preparing a soil investigation or need Atterberg limits alongside moisture content testing for an upcoming earthwork or foundation project, submit a proposal request and our laboratory staff will outline the appropriate testing scope.
Get our guides in your Google results
Add Construction Materials Testing as a preferred source and Google shows our guides more often when you search for testing topics.