
Why the First Yard Is Off-Limits for Concrete Sampling
Every technician has felt the pressure to grab a sample the moment the chute starts flowing. The truck is positioned, the inspector is waiting, and the pour crew wants to keep moving. That instinct to sample early is one of the most consequential errors in field concrete testing, and ASTM C172 addresses it directly by prohibiting samples from the first and last 10% of a load. Understanding why that rule exists changes how you see every sample you take.
The first material out of a mixer drum is not representative of the batch. During transport, the paste migrates, coarse aggregate settles toward the rear of the drum, and the water-cement ratio at the discharge end of an early discharge is almost never uniform. If you sample that first cubic yard from a ten-yard load, you are testing a fraction of the batch that is systematically different from what will end up in the structure. The test results — slump, air content, unit weight, and cylinders — will not reflect the concrete actually placed.
The last 10% is excluded for a related reason. As the drum empties, mortar tends to discharge ahead of the remaining coarse aggregate, skewing the sample in the opposite direction. A composite pulled from mid-load, across two or more increments, averages out those gradients and gives you a result that represents the load as a whole. That is the entire point of field testing: confirming that what enters the structure meets the specification.
What ASTM C172 Actually Requires
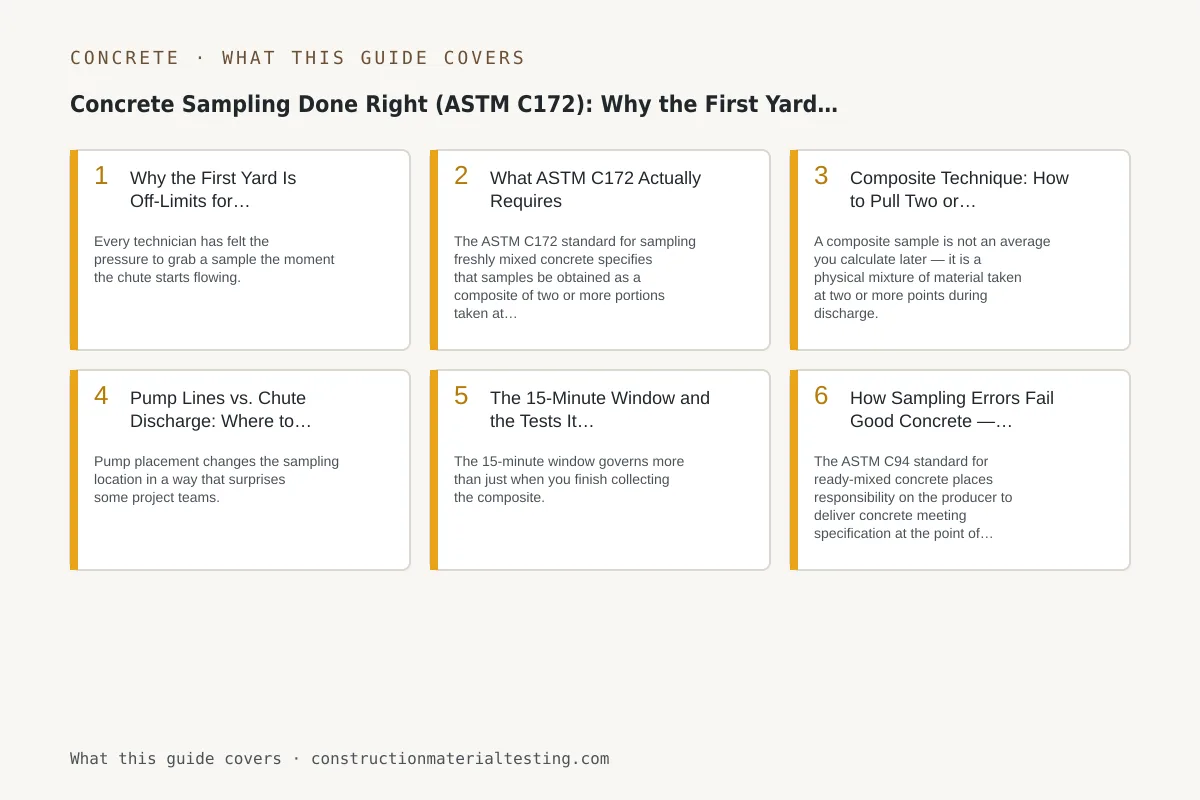
The ASTM C172 standard for sampling freshly mixed concrete specifies that samples be obtained as a composite of two or more portions taken at regularly spaced intervals during discharge of the middle portion of the batch — explicitly after the first 10% and before the last 10% have been discharged. The composite sample must represent the full cross-section of the discharge stream, not a grab from the side of the flow where paste concentrates.
Timing is the other constraint that catches technicians off guard. Once the first increment of the composite is taken, you have 15 minutes to collect all increments and begin the first field test. That window is not generous. On a hot Texas summer afternoon with a large composite sample and multiple tests queued, 15 minutes from first increment to slump cone down is a realistic constraint, not a comfortable buffer. The ASTM C172 test method page outlines the sequence, and it demands that you plan your setup — wheelbarrow, slump cone, air meter, thermometer — before the truck ever pulls up.
The standard also requires that the sample be transported to the testing location and protected from sunlight, wind, and drying. In practice that means keeping the wheelbarrow shaded, not letting it sit on hot asphalt in direct sun while you walk across a jobsite, and beginning tests promptly rather than waiting for the superintendent to finish a phone call.
Composite Technique: How to Pull Two or More Increments Correctly
A composite sample is not an average you calculate later — it is a physical mixture of material taken at two or more points during discharge. In practice this means positioning the sampling receptacle to intercept the full width of the discharge stream, collecting one portion from roughly the one-third point of discharge and a second from the two-thirds point, then combining them in the wheelbarrow and re-mixing by hand for 30 seconds to one minute before any portion is taken for individual tests. Skipping the re-mix step introduces the same bias you were trying to avoid.
The receptacle matters. A wide, low-profile wheelbarrow or a large pail works. A small bucket held to one side of the chute does not capture a representative cross-section. For chute discharge, move the receptacle steadily across the stream so that material from the center of the flow — where the aggregate concentration is highest — is included. A technician who holds the bucket at the edge because the center splashes is inadvertently biasing every sample they collect.
Details about how to re-mix the composite and proportion it into individual test containers are covered in our ASTM C172 test method reference. The re-mixing step is brief but non-negotiable: it homogenizes any segregation that occurred during transport from the truck to the testing area.
Pump Lines vs. Chute Discharge: Where to Sample
Pump placement changes the sampling location in a way that surprises some project teams. When concrete is conveyed by pump, ASTM C172 is clear that the sample must be taken from the discharge end of the hose, not from the truck chute feeding the pump. This matters because pumping alters air content — particularly entrained air — and can affect slump in long or high-pressure runs. A sample taken at the pump inlet will not represent what enters the forms.
Catching a composite at the end of a pump hose is less convenient than sampling from a chute. The hose operator has to slow or pause discharge, the technician has to position the receptacle under a hose that may be several feet off the ground or angled into a form, and the process takes coordination with the pump operator. That coordination has to be built into the pre-pour plan. Trying to improvise sampling at a pump discharge mid-pour, under time pressure, is where technique falls apart.
For slump testing from pump samples, be aware that the values may differ from what the batch plant expects based on their design mix slump target, because the pump consumes some workability. Document that you sampled at the point of discharge from the hose. Our slump test method page explains how to conduct the slump cone test immediately after compositing, which is essential when pump discharge is the sampling point and the 15-minute clock is already running.
The 15-Minute Window and the Tests It Controls
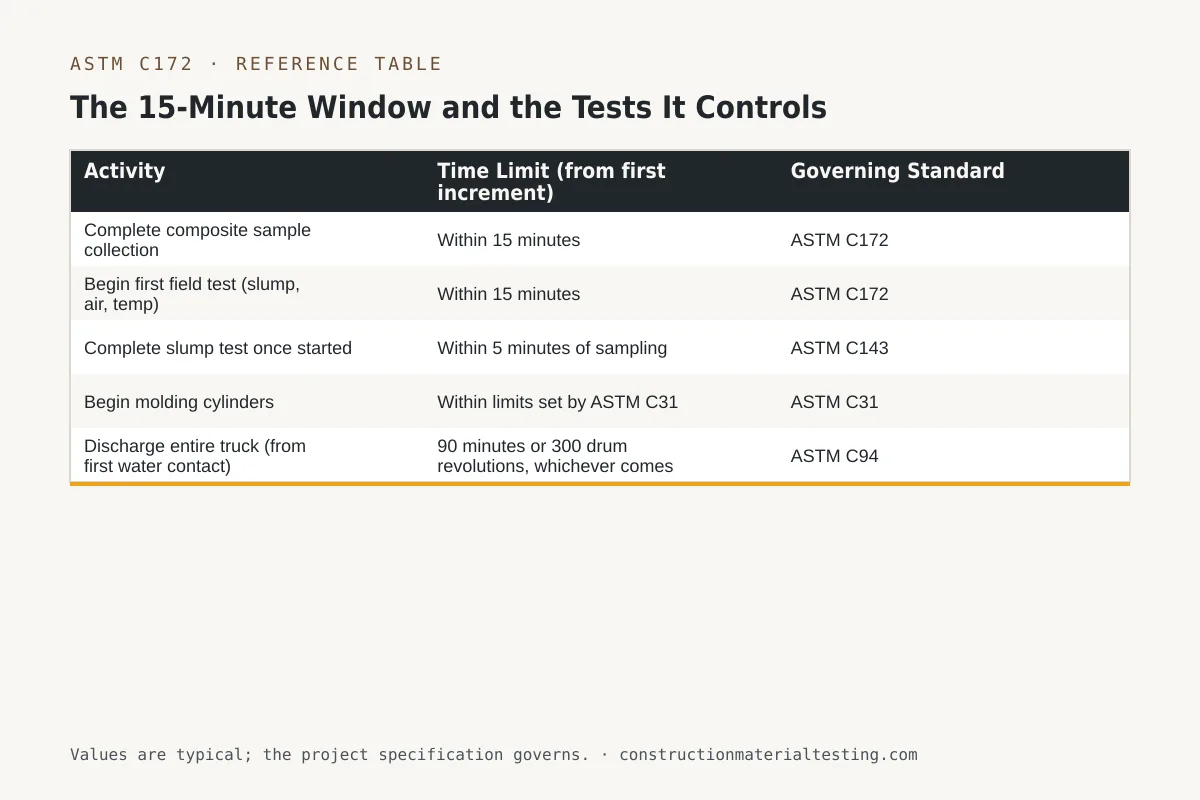
The 15-minute window governs more than just when you finish collecting the composite. It sets the deadline for starting the first field test — slump, temperature, air content, or unit weight, whichever comes first. ACI 318 and the project specification may impose additional time limits on when cylinders must be cast after sampling. ASTM C31, which governs making and curing cylinders, requires that cylinders be started within a specific time after sampling — review your applicable standard edition for the precise limit — so the 15-minute composite window feeds directly into that deadline.
The table below summarizes the key timing constraints and what they govern. These are not suggestions; exceeding them is a protocol failure that invalidates the sample, which means the test result cannot be used as acceptance data under most specifications.
| Activity | Time Limit (from first increment) | Governing Standard |
|---|---|---|
| Complete composite sample collection | Within 15 minutes | ASTM C172 |
| Begin first field test (slump, air, temp) | Within 15 minutes | ASTM C172 |
| Complete slump test once started | Within 5 minutes of sampling | ASTM C143 |
| Begin molding cylinders | Within limits set by ASTM C31 | ASTM C31 |
| Discharge entire truck (from first water contact) | 90 minutes or 300 drum revolutions, whichever comes first | ASTM C94 |
How Sampling Errors Fail Good Concrete — and Pass Bad Concrete
The ASTM C94 standard for ready-mixed concrete places responsibility on the producer to deliver concrete meeting specification at the point of discharge. The field technician's responsibility is to sample that concrete in a way that accurately represents it. When sampling protocol fails, the connection between the test result and the actual material is broken — and the failure cuts both ways.
A sample taken too early — from the first discharge — may show lower slump and higher unit weight than the body of the load, because the leading material is stiffer and coarser. That result could trigger a rejection of a load that, had it been sampled correctly, would have passed. The producer is then forced to argue over procedure rather than results, the pour is delayed, and the project absorbs the cost of a dispute that was entirely avoidable.
The reverse is also possible. A sample taken from the middle of the stream but biased toward the paste-rich edge of the chute may show higher slump than the aggregate-rich core. Cylinders made from that sample may break higher than the structural concrete actually placed. In that scenario, a specification-noncompliant batch is accepted because the sample was not representative. That outcome is more dangerous and less visible — no one disputes a passing result. This is why we treat sampling protocol as a quality control step with structural consequences, not an administrative formality. Cylinder making and curing per ASTM C31 is the downstream step most directly affected by a compromised composite sample.
Our materials testing services cover the full chain from sampling through compressive strength reporting, and consistency in that chain — same standard, same technique, documented timestamps — is what makes acceptance data defensible when a dispute arises.
Where Concrete Sampling Fits on Your Project
Concrete sampling is one of those tasks that looks routine until results are questioned, at which point every detail of how the sample was collected becomes critical. Projects with special inspection requirements under IBC Section 1705 require that sampling be performed by qualified personnel following the applicable ASTM procedures. Having a technician on site who understands the 10% exclusion zones, the composite technique, the 15-minute window, and the difference between pump and chute sampling is not a luxury — it is a condition of producing defensible test data.
If you are planning a concrete pour and need to confirm that your inspection and testing plan addresses sampling frequency, location, and documentation, submit a proposal request and we can review the specification requirements with you before the first truck arrives.
Get our guides in your Google results
Add Construction Materials Testing as a preferred source and Google shows our guides more often when you search for testing topics.