
Why Dry Sieving Alone Is Not Enough
Dry sieving is fast and intuitive, but it has a built-in blind spot: clay platelets and silt-sized particles cling electrostatically to the surfaces of sand and gravel grains. Shake the stack as long as you like and those coatings stay put, reporting as retained mass instead of passing mass. The result is a gradation curve that underestimates the fines fraction—sometimes by several percentage points—which matters enormously when the specification limits percent passing the No. 200 to 3% for a base aggregate or requires at least 35% fines for a particular soil classification.
The sieve analysis wash method solves this by suspending the fines in water first, then decanting the cloudy wash water through a No. 200 sieve before you ever touch a mechanical shaker. Water breaks the surface-tension and electrostatic bonds between fine particles and coarse ones, liberating material that dry agitation cannot. The retained mass after washing and drying is the true coarse fraction; the lost mass is the true fines content. ASTM C117 codifies this procedure for mineral aggregates, while ASTM D6913 incorporates wet preparation for soils gradation work.
Which Standard Governs Your Material
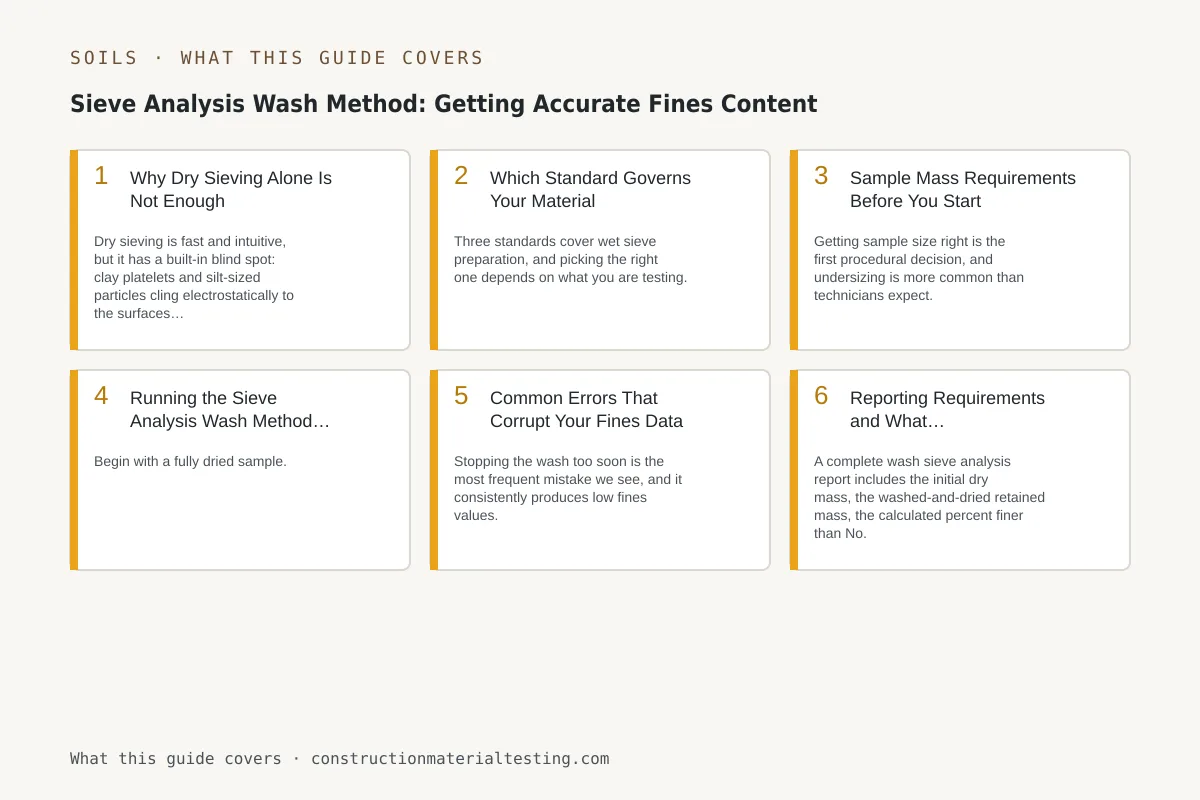
Three standards cover wet sieve preparation, and picking the right one depends on what you are testing. For crushed stone, gravel, and manufactured sand used in concrete or asphalt, ASTM C117 is the dedicated washing procedure. It is almost always run in conjunction with ASTM C136, which governs the full sieve stack analysis—C117 gives you the minus-200 mass, then C136 distributes the retained material across the coarser sieves. Most aggregate acceptance specifications reference both together.
For natural soils, fill, and subgrade materials, ASTM D6913 is the governing procedure. It includes wet preparation as the default when the material contains fines, and it also addresses dispersion of cohesive soils with a sodium hexametaphosphate solution when simple soaking is insufficient to break up clay aggregations. Geotechnical reports and earthwork specifications—including those written to AASHTO M 145 soil classification—rely on D6913 gradation data. If you are unsure which standard your project specification calls for, check the materials testing plan or the soils and foundations section of the project geotechnical report before you begin.
One thing both families of standards share: the wash step is not optional when fines are present. Running C136 or D6913 dry on material that has visible dust or clay content produces non-compliant data regardless of how carefully you run the mechanical sieve portion.
Sample Mass Requirements Before You Start
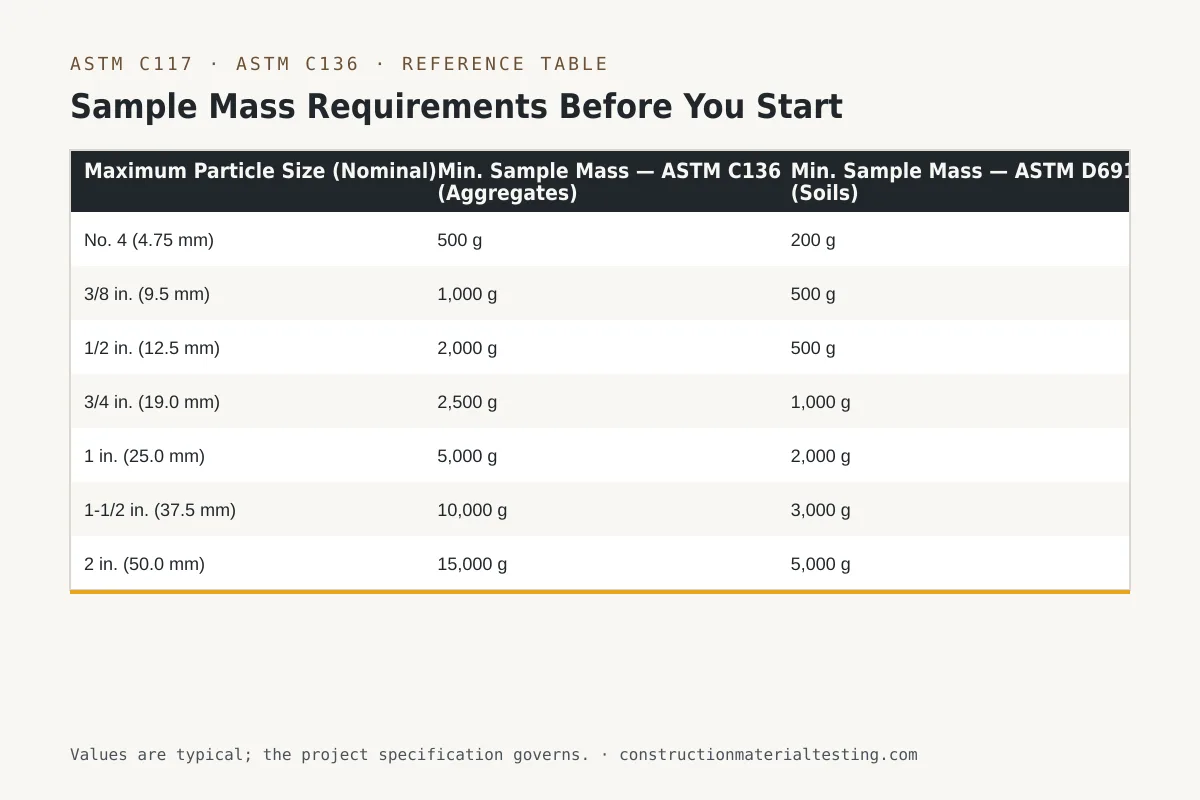
Getting sample size right is the first procedural decision, and undersizing is more common than technicians expect. Too little material and a single coarse particle can shift the percent retained on the largest sieve by several points; too much and you overload the No. 200 mesh during washing. The required minimum mass is a function of the maximum nominal particle size in the sample—larger top-size material needs more mass to be statistically representative.
The table below summarizes the minimum dry sample masses specified in ASTM C136 and ASTM D6913 by maximum particle size. These are minimums; when field samples arrive oversized, split them with a mechanical splitter or riffle box before drying, not by hand coning and quartering alone. Record the mass of the portion you are testing—this becomes W₁ in your calculation—before any washing begins.
| Maximum Particle Size (Nominal) | Min. Sample Mass — ASTM C136 (Aggregates) | Min. Sample Mass — ASTM D6913 (Soils) |
|---|---|---|
| No. 4 (4.75 mm) | 500 g | 200 g |
| 3/8 in. (9.5 mm) | 1,000 g | 500 g |
| 1/2 in. (12.5 mm) | 2,000 g | 500 g |
| 3/4 in. (19.0 mm) | 2,500 g | 1,000 g |
| 1 in. (25.0 mm) | 5,000 g | 2,000 g |
| 1-1/2 in. (37.5 mm) | 10,000 g | 3,000 g |
| 2 in. (50.0 mm) | 15,000 g | 5,000 g |
Running the Sieve Analysis Wash Method Step by Step
Begin with a fully dried sample. Place the portion in a drying oven at 110 ± 5 °C until you reach constant mass—two successive weighings at least one hour apart that differ by less than 0.1% of the sample mass. Record this as your initial dry mass (W₁). Transfer the dried material to a clean wash container with enough volume to hold the sample submerged with room to agitate. For soils with plastic fines, add a 2% sodium hexametaphosphate solution instead of plain water and soak for at least 10 minutes to break up clay packets. For aggregate and non-plastic granular soils, plain tap water is sufficient.
Nest a No. 16 or No. 8 sieve above the No. 200 to protect the fine mesh from impact by coarse particles. Pour the slurry through this nest in batches, using a gentle stream of water to rinse remaining fines from the container and from the coarse particles. The No. 16 intercepts anything large enough to damage the No. 200 wire cloth. Work carefully here: high-pressure hosing or dropping the container lip-to-lip against the sieve frame are both common ways to distort or tear the No. 200 mesh, and a damaged sieve invalidates the test. Continue rinsing until the water passing through the No. 200 runs clear—not just lighter, but visually clear. In practice this usually takes three to six fill-and-drain cycles depending on clay content.
Once washing is complete, transfer all material retained on both sieves back into the wash pan. The fines that passed the No. 200 are captured implicitly as the mass difference—do not try to recover them from the wash water. Dry the retained material at 110 ± 5 °C to constant mass and record this as W₂. The percent material finer than No. 200 by washing equals [(W₁ − W₂) / W₁] × 100. Then transfer the oven-dried retained material to your full sieve stack and run the mechanical shaker per C136 or D6913 for the complete gradation. The minus-200 fraction from washing is added to the bottom of the gradation curve; do not double-count any material that may still pass the No. 200 during dry sieving—in practice this residual is small, but the standard tells you how to handle it.
Common Errors That Corrupt Your Fines Data
Stopping the wash too soon is the most frequent mistake we see, and it consistently produces low fines values. The visual clarity check is the practical indicator the standard gives you, and it works—but only if you are honest about it. Slightly turbid water still carries minus-200 material. When in doubt, run one more rinse cycle. The extra two minutes is worth more than defending a non-conforming gradation report later.
Overloading the No. 200 sieve is the second common error. If you pour the entire wash slurry through at once on a heavily fine-laden sample, the mesh blinds—particles lodge in openings and act as a physical barrier rather than a classifier. Retained mass goes up, apparent fines go down, and the result is wrong in the non-conservative direction. Split washing into multiple passes if your sample mass is at the high end of the range for its particle size, or if the material is visually clay-rich.
Losing retained material during transfer is subtler. Every gram of coarse particle that stays stuck in the wash pan or on the sides of the protection sieve shifts your calculated fines upward because W₂ goes down. Rinse all equipment into the retained fraction carefully, and weigh the dried retained material before you load it onto the sieve stack—that weight check is your quality control step. We also make sure the balance is calibrated and zeroed with the appropriate tare before each weighing; a 2-gram offset on a 500-gram sample creates a 0.4% error before you even begin the sieve portion.
Reporting Requirements and What Specifications Check
A complete wash sieve analysis report includes the initial dry mass, the washed-and-dried retained mass, the calculated percent finer than No. 200 by washing, and the full percent-passing values for each sieve in the stack. Reports under D6913 also require the sample identification, boring or sample location, sample depth, and the technician's identification. Specifications will typically flag the No. 200 result first, then check the No. 4 and the intermediate sieves against the gradation band.
For concrete aggregate tested under C117 and C136, the percent passing the No. 200 is subject to the limits in ASTM C33—3.0% maximum for concrete subject to abrasion, 5.0% for other concrete, with crushed material allowed one percentage point higher in each category. For base course and subbase aggregates, TxDOT specifications and local project documents set their own gradation bands; always check the project-specific materials specification rather than assuming a universal limit. For soils, the percent finer than No. 200 feeds directly into the Unified Soil Classification System and AASHTO M 145 classifications, which then drive compaction specifications, subgrade treatment decisions, and sometimes foundation design parameters.
Where This Fits on Your Project
Wash sieve testing appears at multiple points in a typical project: during aggregate source approval before construction begins, during earthwork QC as fill materials are placed and compacted, and during concrete or asphalt mix design verification. Missing a high fines content in a base course aggregate at source approval can show up months later as premature rutting or pumping—issues that cost far more to remediate than a timely laboratory test.
Our technicians run both the ASTM C117 wash procedure and the ASTM C136 sieve analysis as a paired service for aggregate acceptance, and we run ASTM D6913 gradation testing as part of standard earthwork material characterization. If you have an upcoming project that requires aggregate or soil gradation data—whether for a materials submittal, a pre-construction quality plan, or special inspection—contact our team through the proposal request form to discuss sample submission, turnaround, and reporting format.
Get our guides in your Google results
Add Construction Materials Testing as a preferred source and Google shows our guides more often when you search for testing topics.